If They Ain’t Broke, Why Change?
Old and worn strings have a dull sound and do not stay in tune. Additionally, the instrument becomes more difficult (and painful) to play. I usually play three-hour length gigs. If the strings are near their end-of-life, my fingertips really ached at the end of the night – a problem I don’t experience with new strings. However, I’ve learned it’s usually time to buy new strings when the guitar’s tuning starts to slip on any of all of the treble (three thinnest) strings.
On the rare occasion, old strings may even start to buzz. As an aside, two weeks ago, a customer brought a guitar to my shop with an “A” string buzzing at the only at the 9th fret. I checked to see if any of the adjacent frets were high and causing the buzzing – they were not. I surmised the root cause was the string, changed it voila, the buzz was gone. As stated above, it’s rare but it does happen.
How Often Should I change my strings?
Most of us don’t realize how dull guitar strings sound until they’re replaced with a new set. If you experience any of the symptoms described above, change the strings. Note that that the “sore finger” guideline is only for seasoned players with built up callouses on their fingertips. I play minimum of ten hours/week and I change the strings about every four weeks. So they’re changed after approximately forty hours of playing time. String life will vary between the size (mediums, lights, extra-lights) of the string and by manufacturer.
One String At-a-Time or All-at-Once?
Years ago, I used to change one string at a time. This allowed me to use the remaining five strings as a reference to tune the new string. The advent of inexpensive microphone and later, clip-on vibration based tuners, made the one-at-a-time method was no longer necessary.
Either method (all at once or one-at-a-time) is ok, but my recommendation would be to change them all at once. Removing all of the strings gives you an opportunity to clean the body directly below the strings and the headstock around the tuners.
Either method (all at once or one-at-a-time) will work, but I recommend “all at once” this gives you an opportunity to more easily clean the body directly below the strings and the headstock around the tuners.
The one exception is a guitar with a floating bridge (usually found on archtop guitars). In this case change the strings one-at-a-time as string tension is holding the bridge in place. In this case, consider changing one-at-a-time or changing the four inner-strings and then the two outer (low-E and high-E) strings. This will ensure the bridge will stay in place and not impact the instrument’s intonation.
MYTH: Some players believe removing all the strings at once will impact the neck. This belief is is incorrect. The neck will “relax” with all the strings removed but it will go back to position once it is restrung and tuned.
Getting Down to Business
To properly string a guitar, we’ll will focus on three areas: inserting and pinning the ball-end of the string (acoustic), determining the correct length of string and wrapping the string on the tuning peg.
Pinning the String
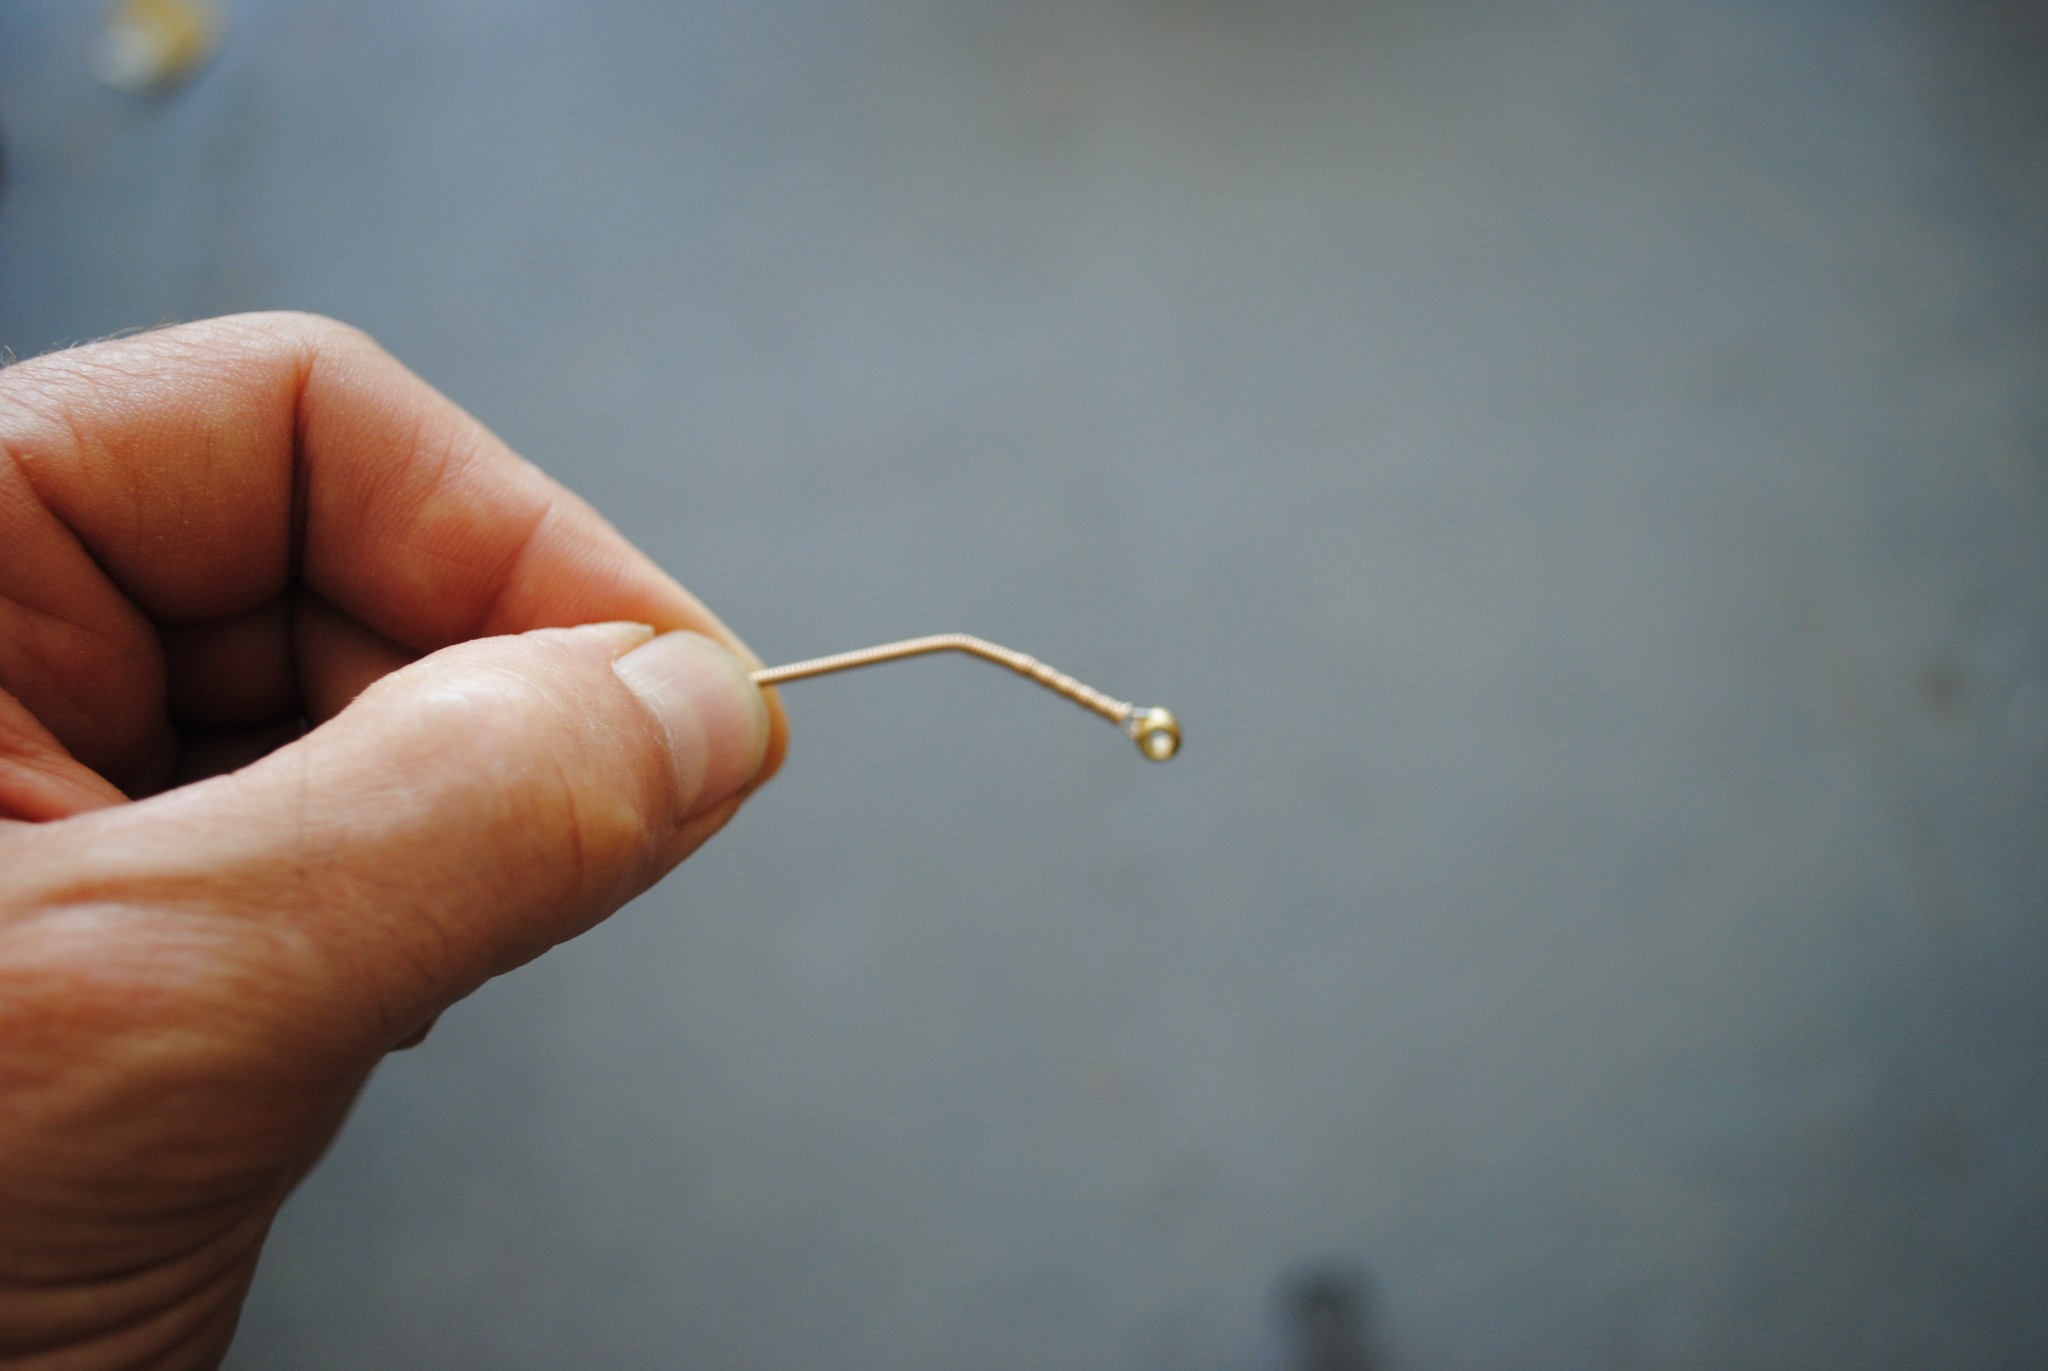
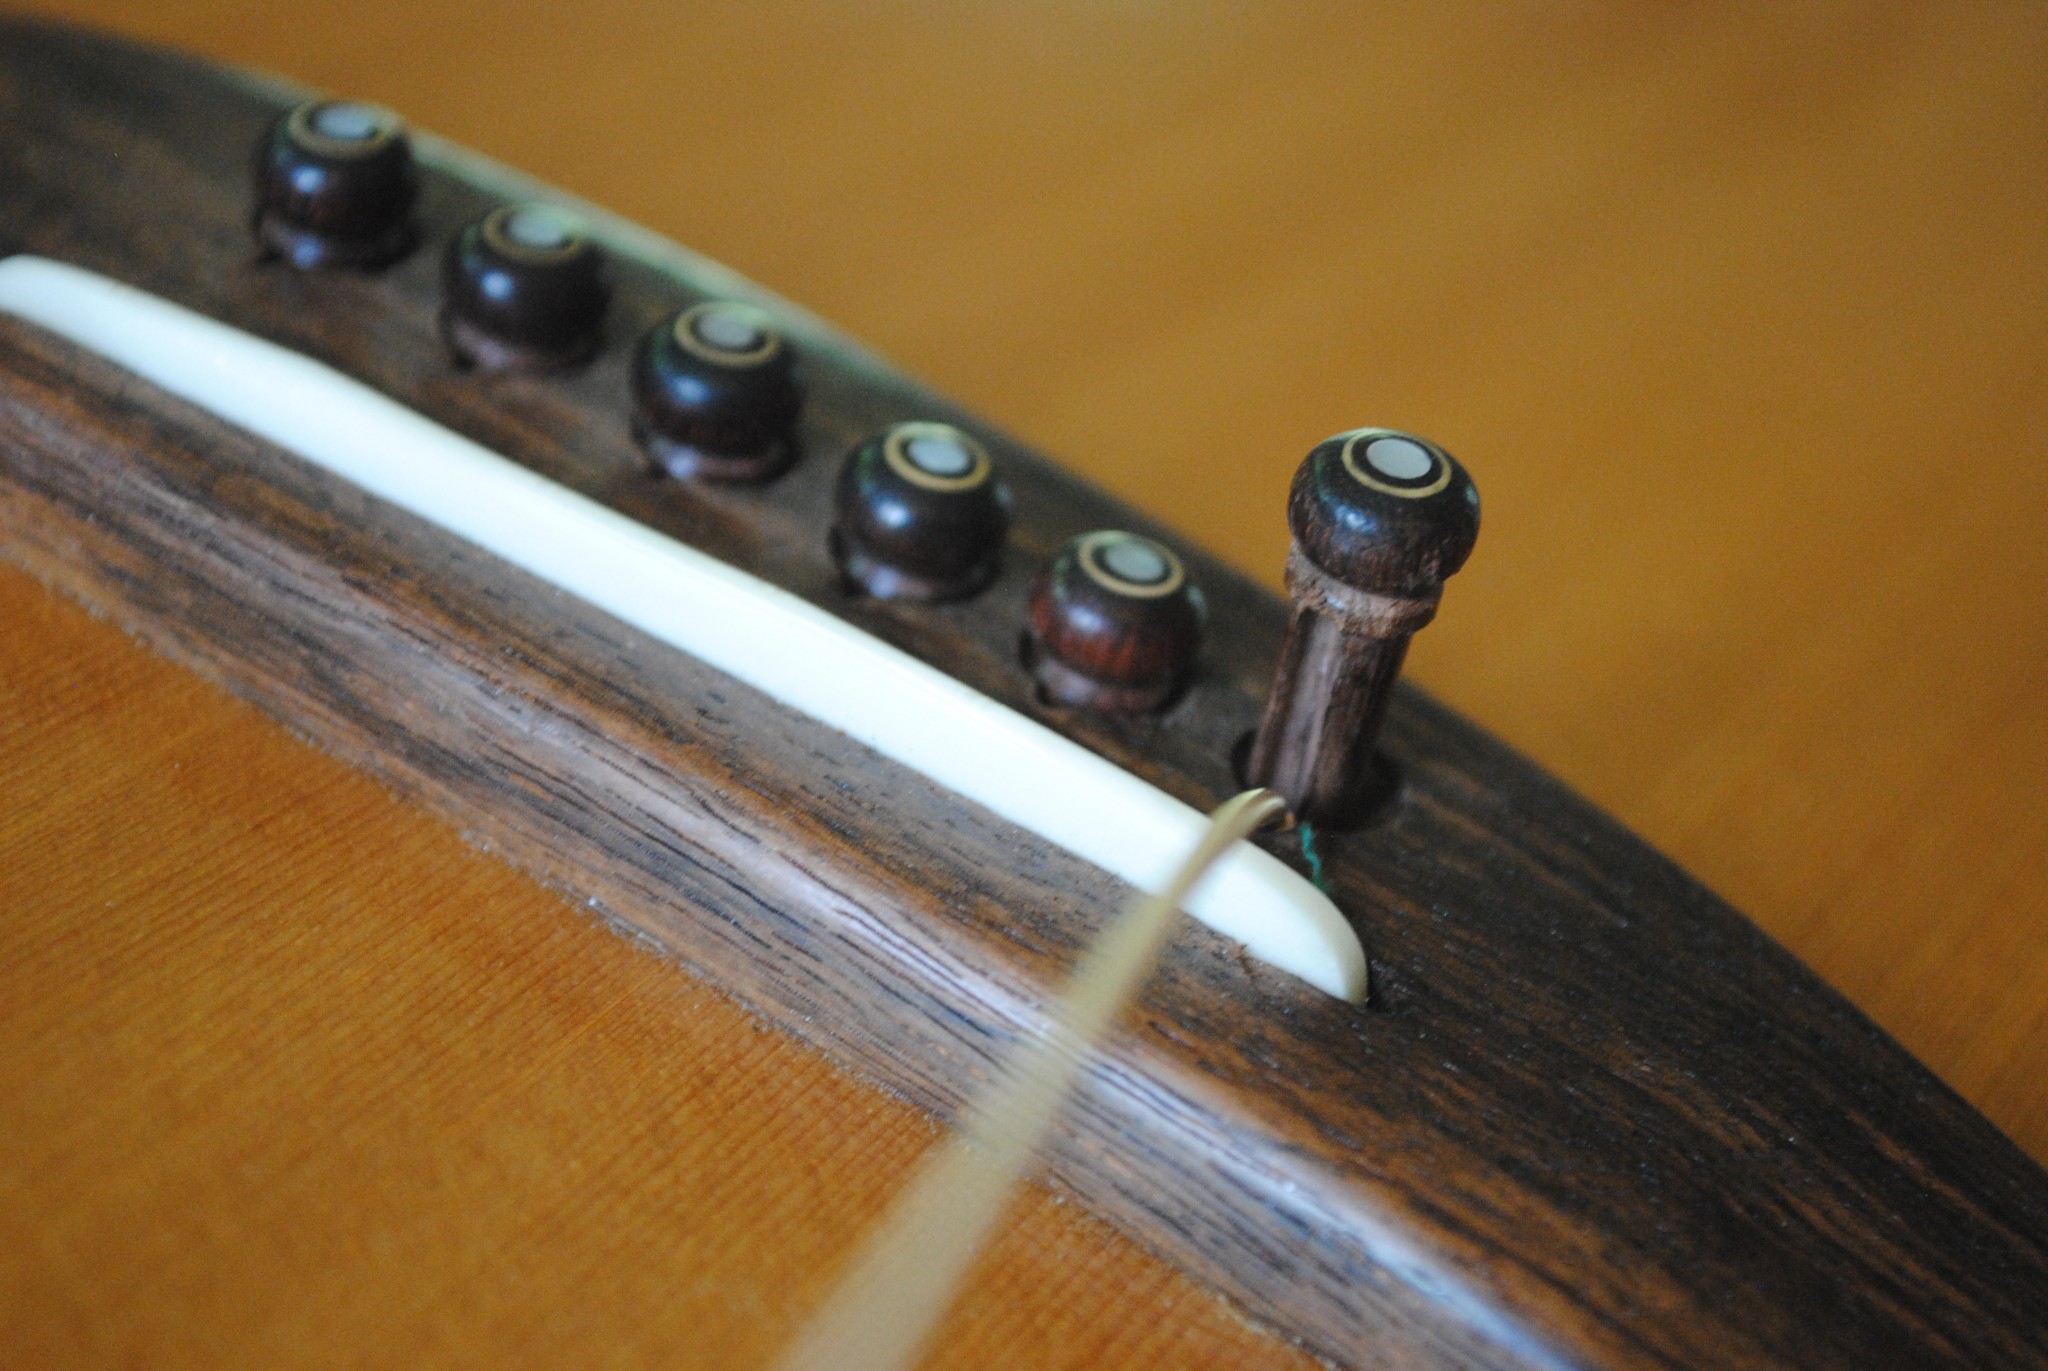
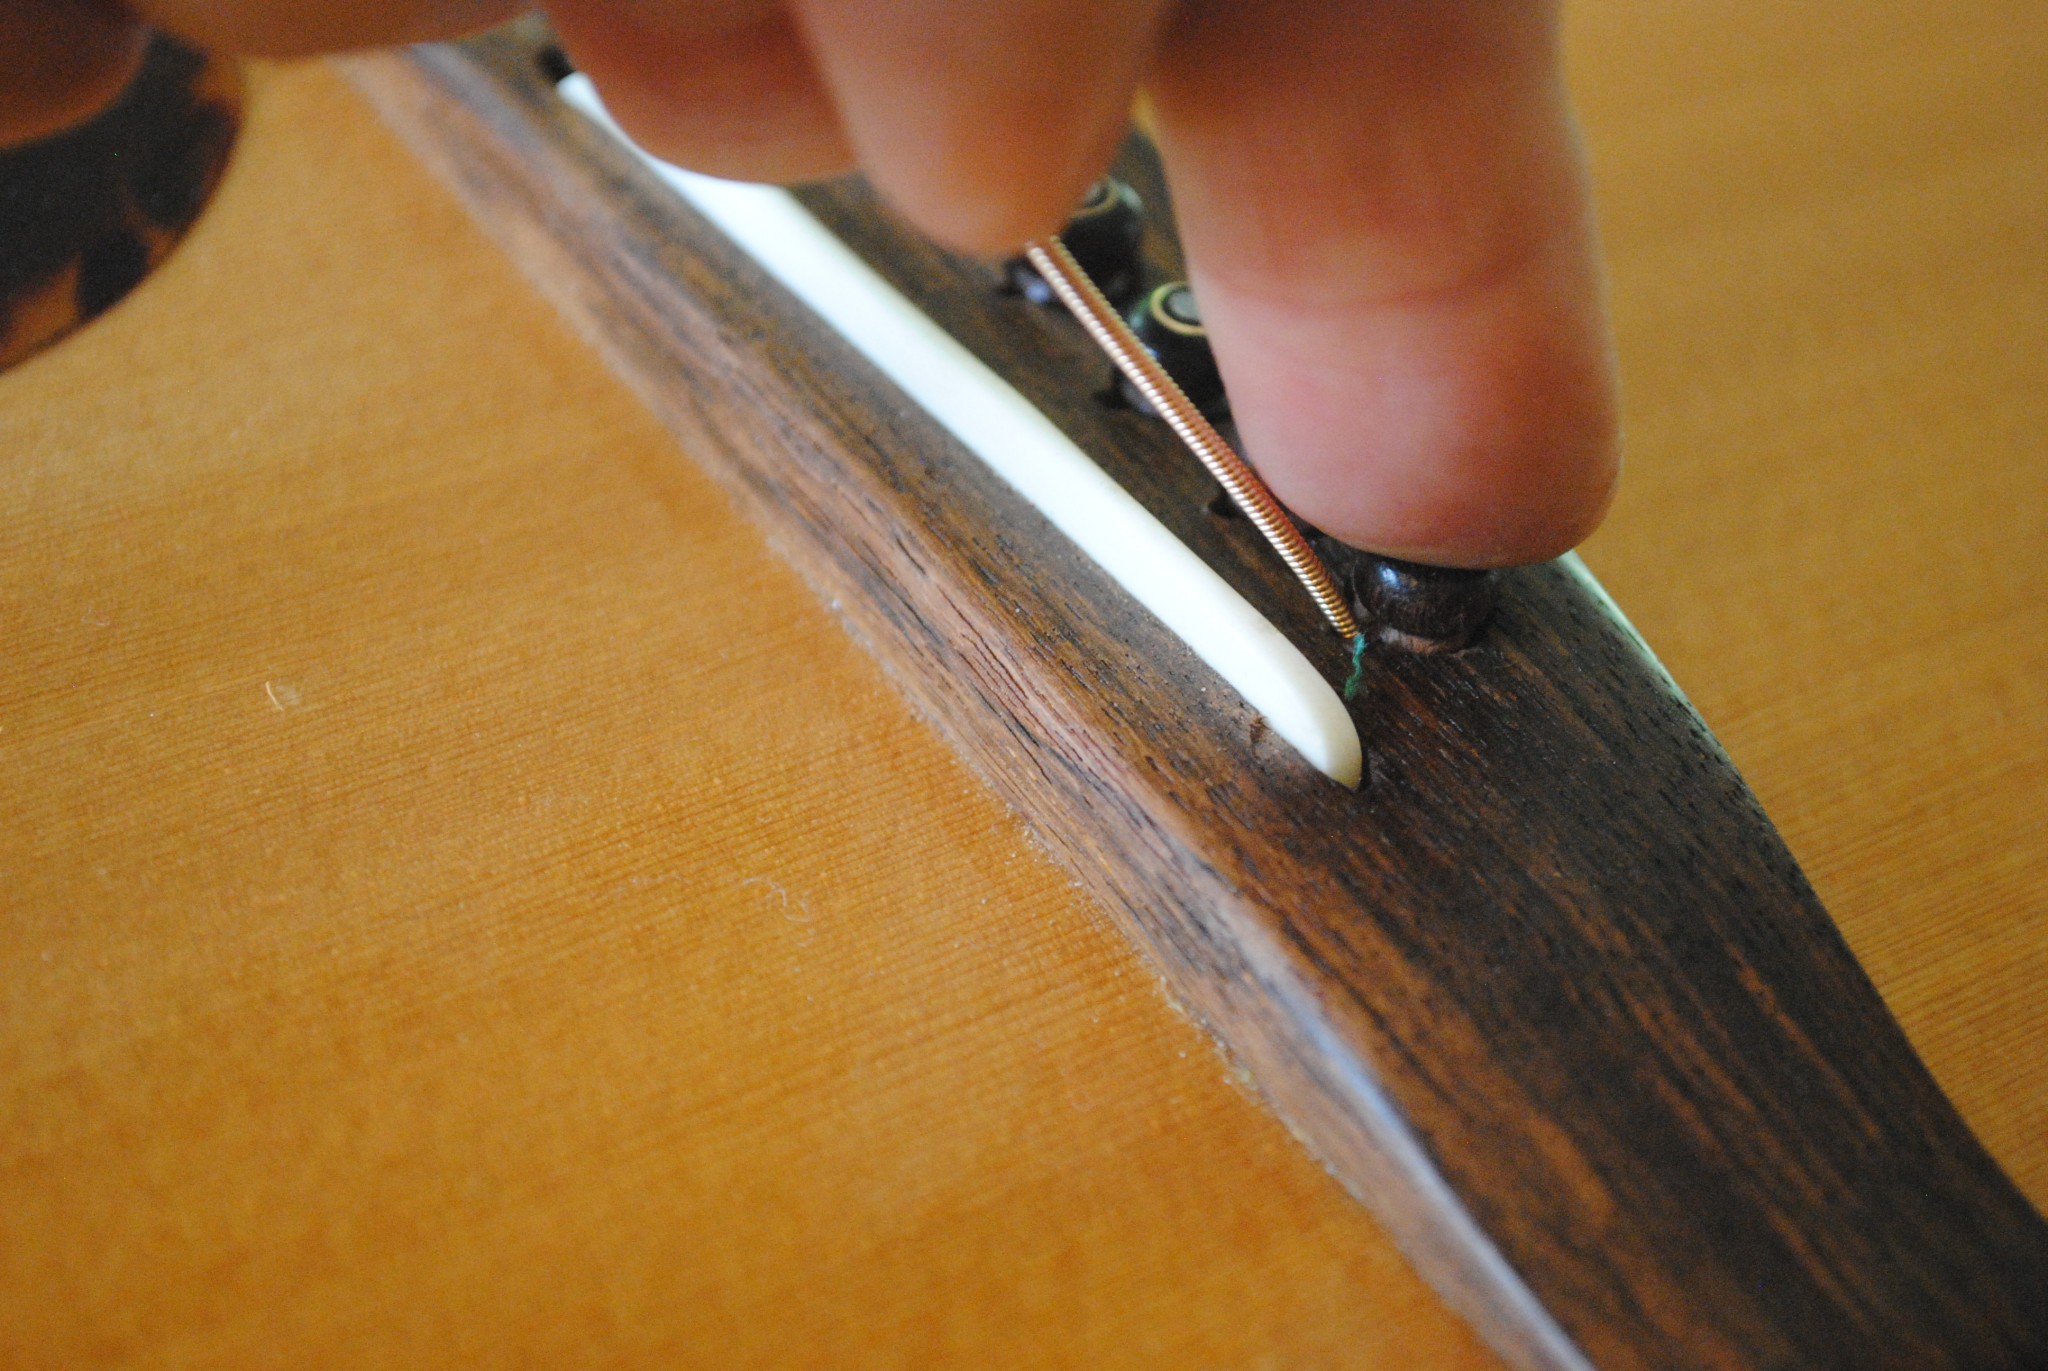
Okay, the strings are off and you’ve cleaned the instrument. On an acoustic guitar, the first step is to put a slight bend (fig. 1) in the ball-end of the string where it leaves the bridge-pin hole. This is usually where the core (wrap) of the string ends. This bend will give your guitar it’s best volume (you may not be able to discern this increase in volume, but it is “technically” true). Next, insert the string into the bridge-pin hole, then insert the bridge pin so the slot in the pin is lined up with the string (fig. 2.) Finally, give a gentle, upward tug on the string so the ball catches at the end of the bridge-pin (fig. 3).
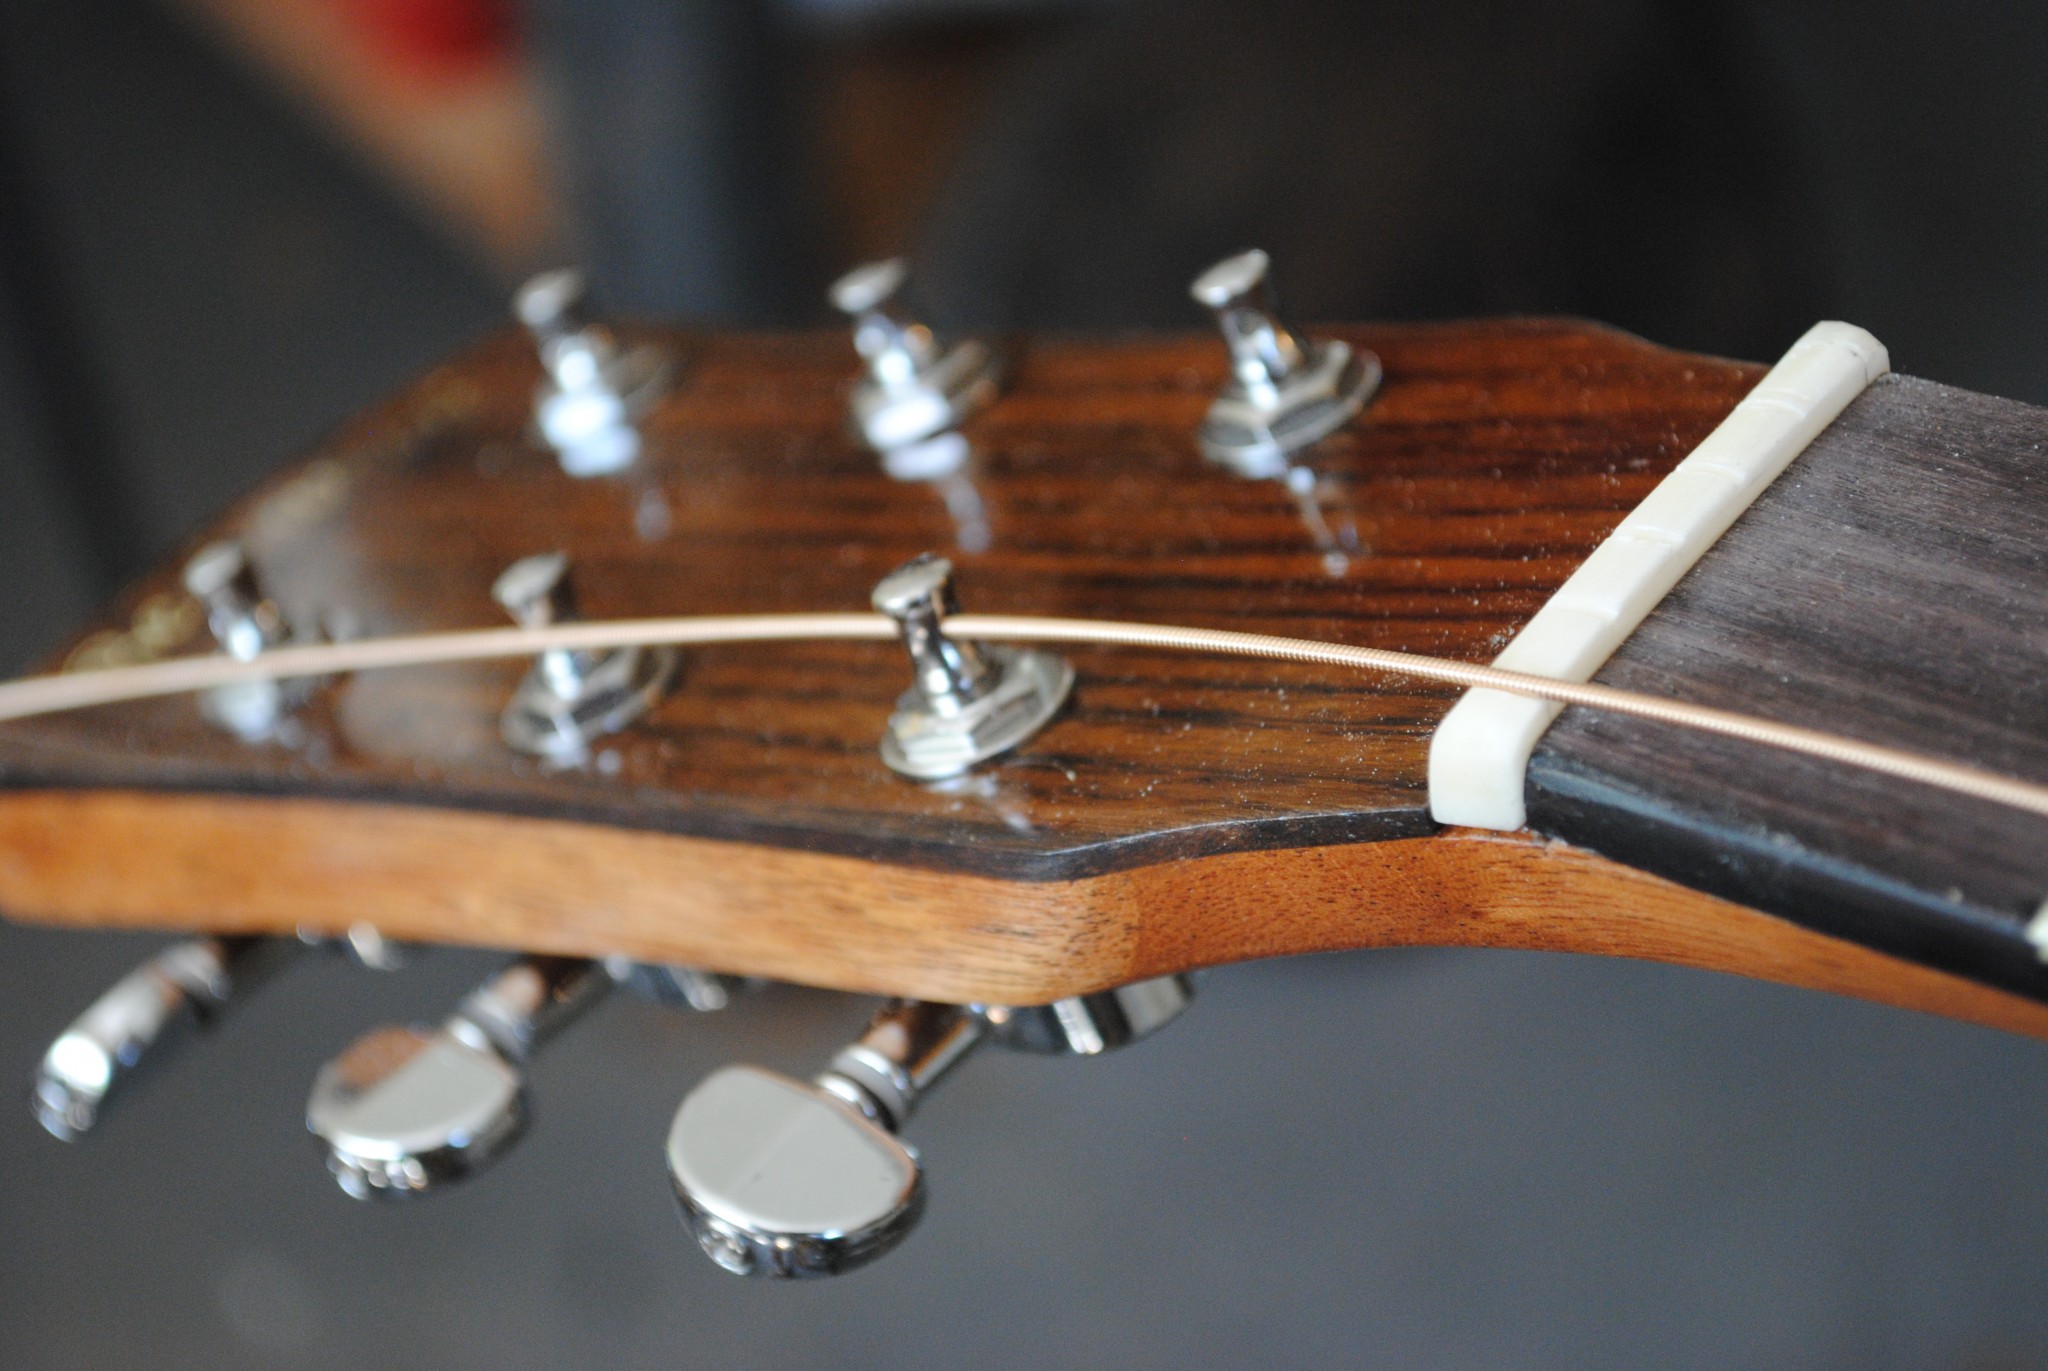
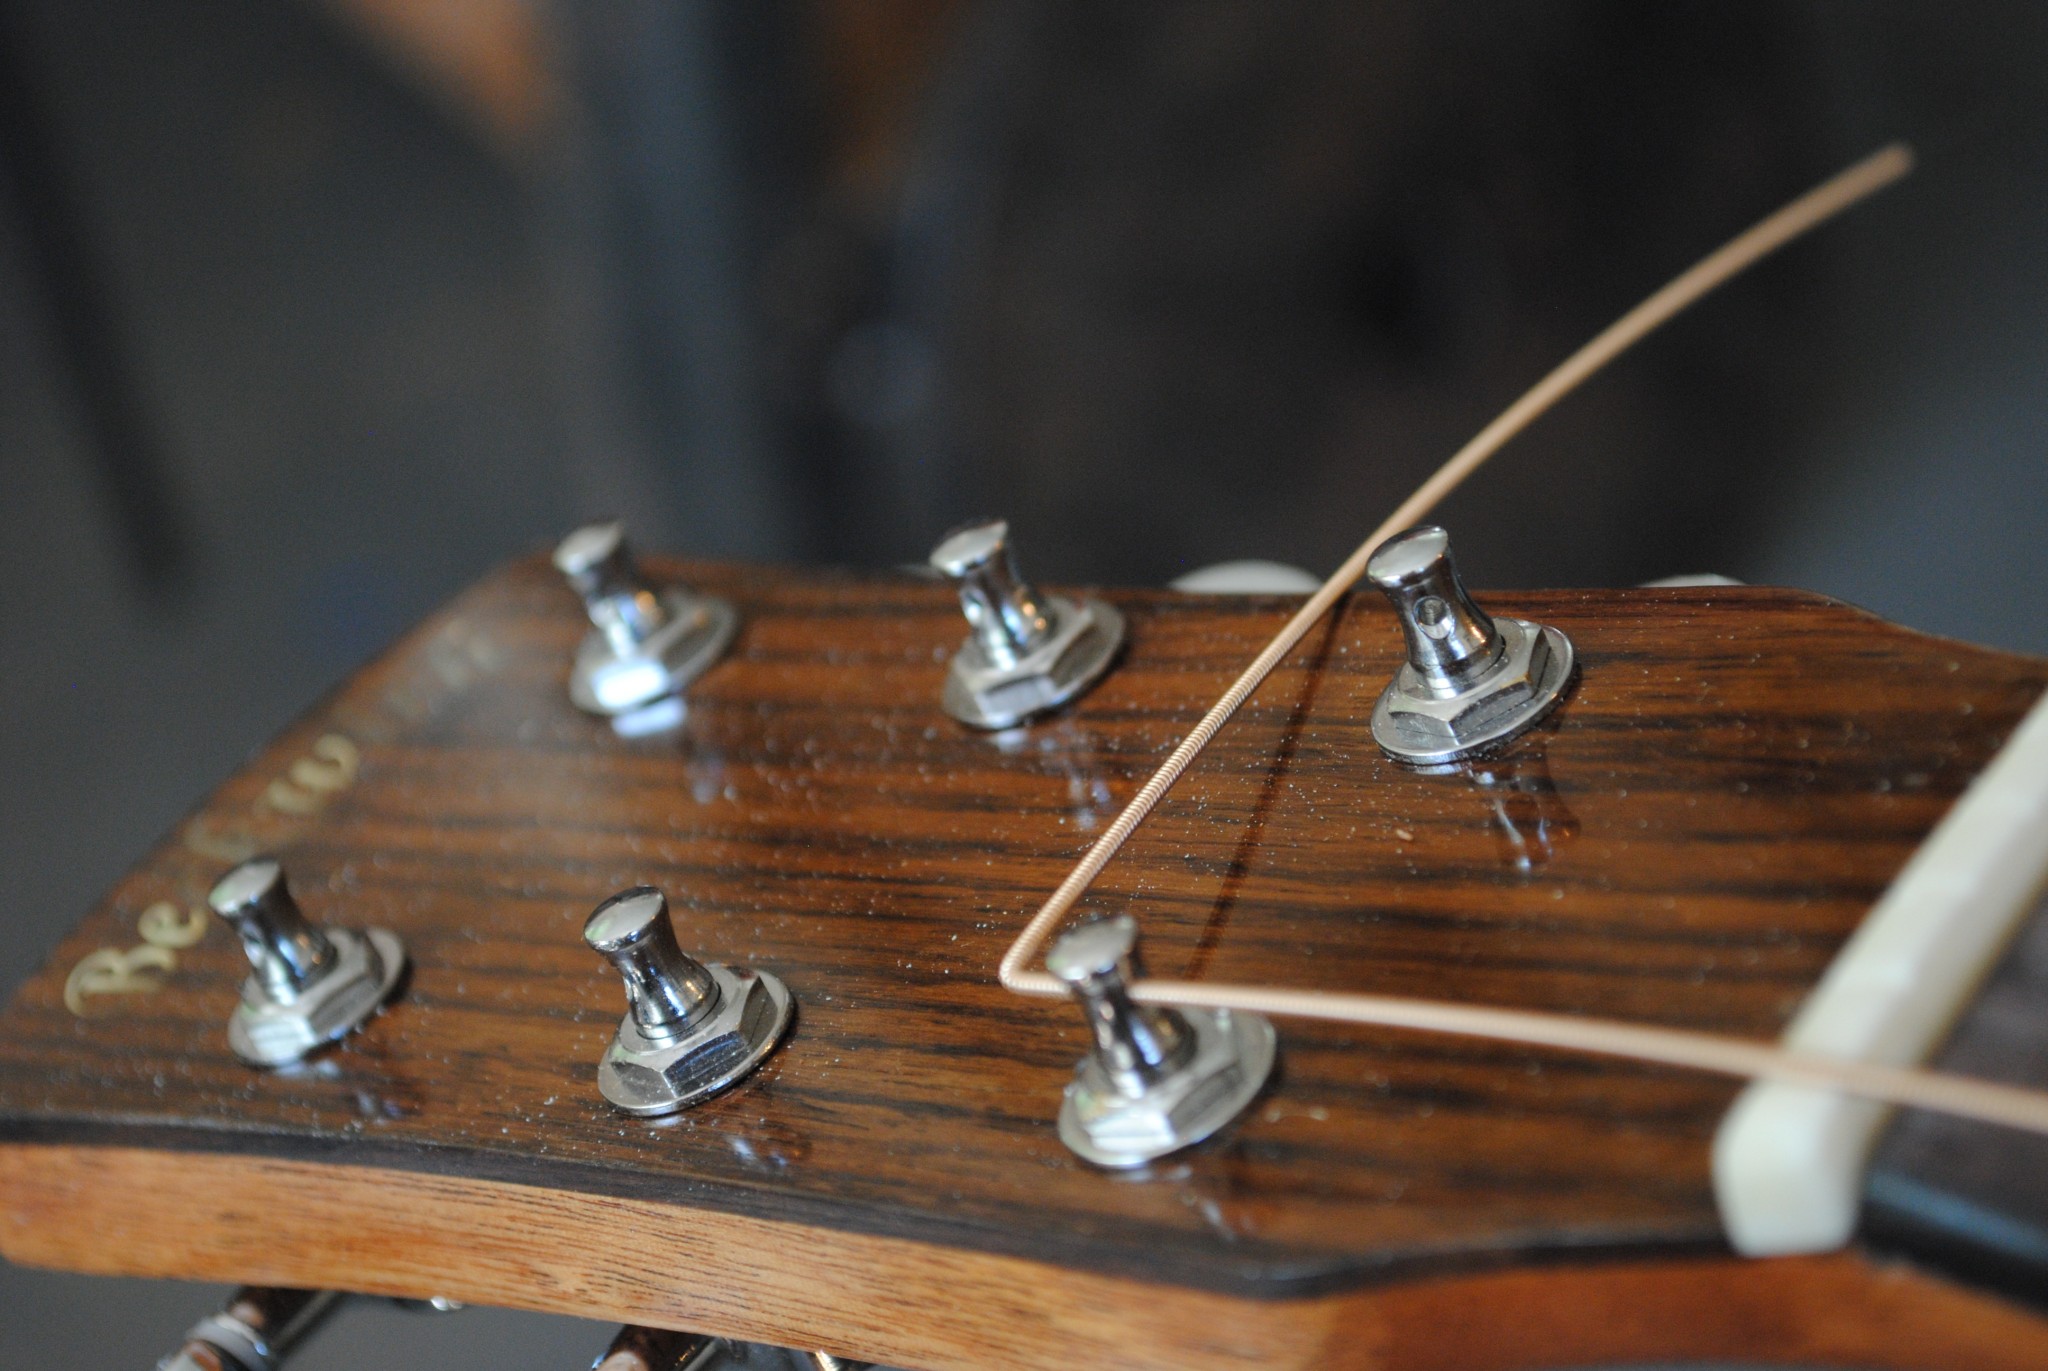
Once the string has been pinned, run the opposite end through the tuning post (fig. 4). Next take four fingers and put them under the string at the 14th fret of the fingerboard (fig. 5) and pull the string taut (fig 6.). Next, bend the string as it exits the tuner towards the center of the neck head (fig. 7).
Once the string has been pinned, run the opposite end through the tuning post (fig. 4). Next take four fingers and put them under the string at the 14th fret of the fingerboard (fig. 5) and pull the string taut (fig 6.). Next, bend the string as it exits the tuner towards the center of the neck head (fig. 7).

The Wrap
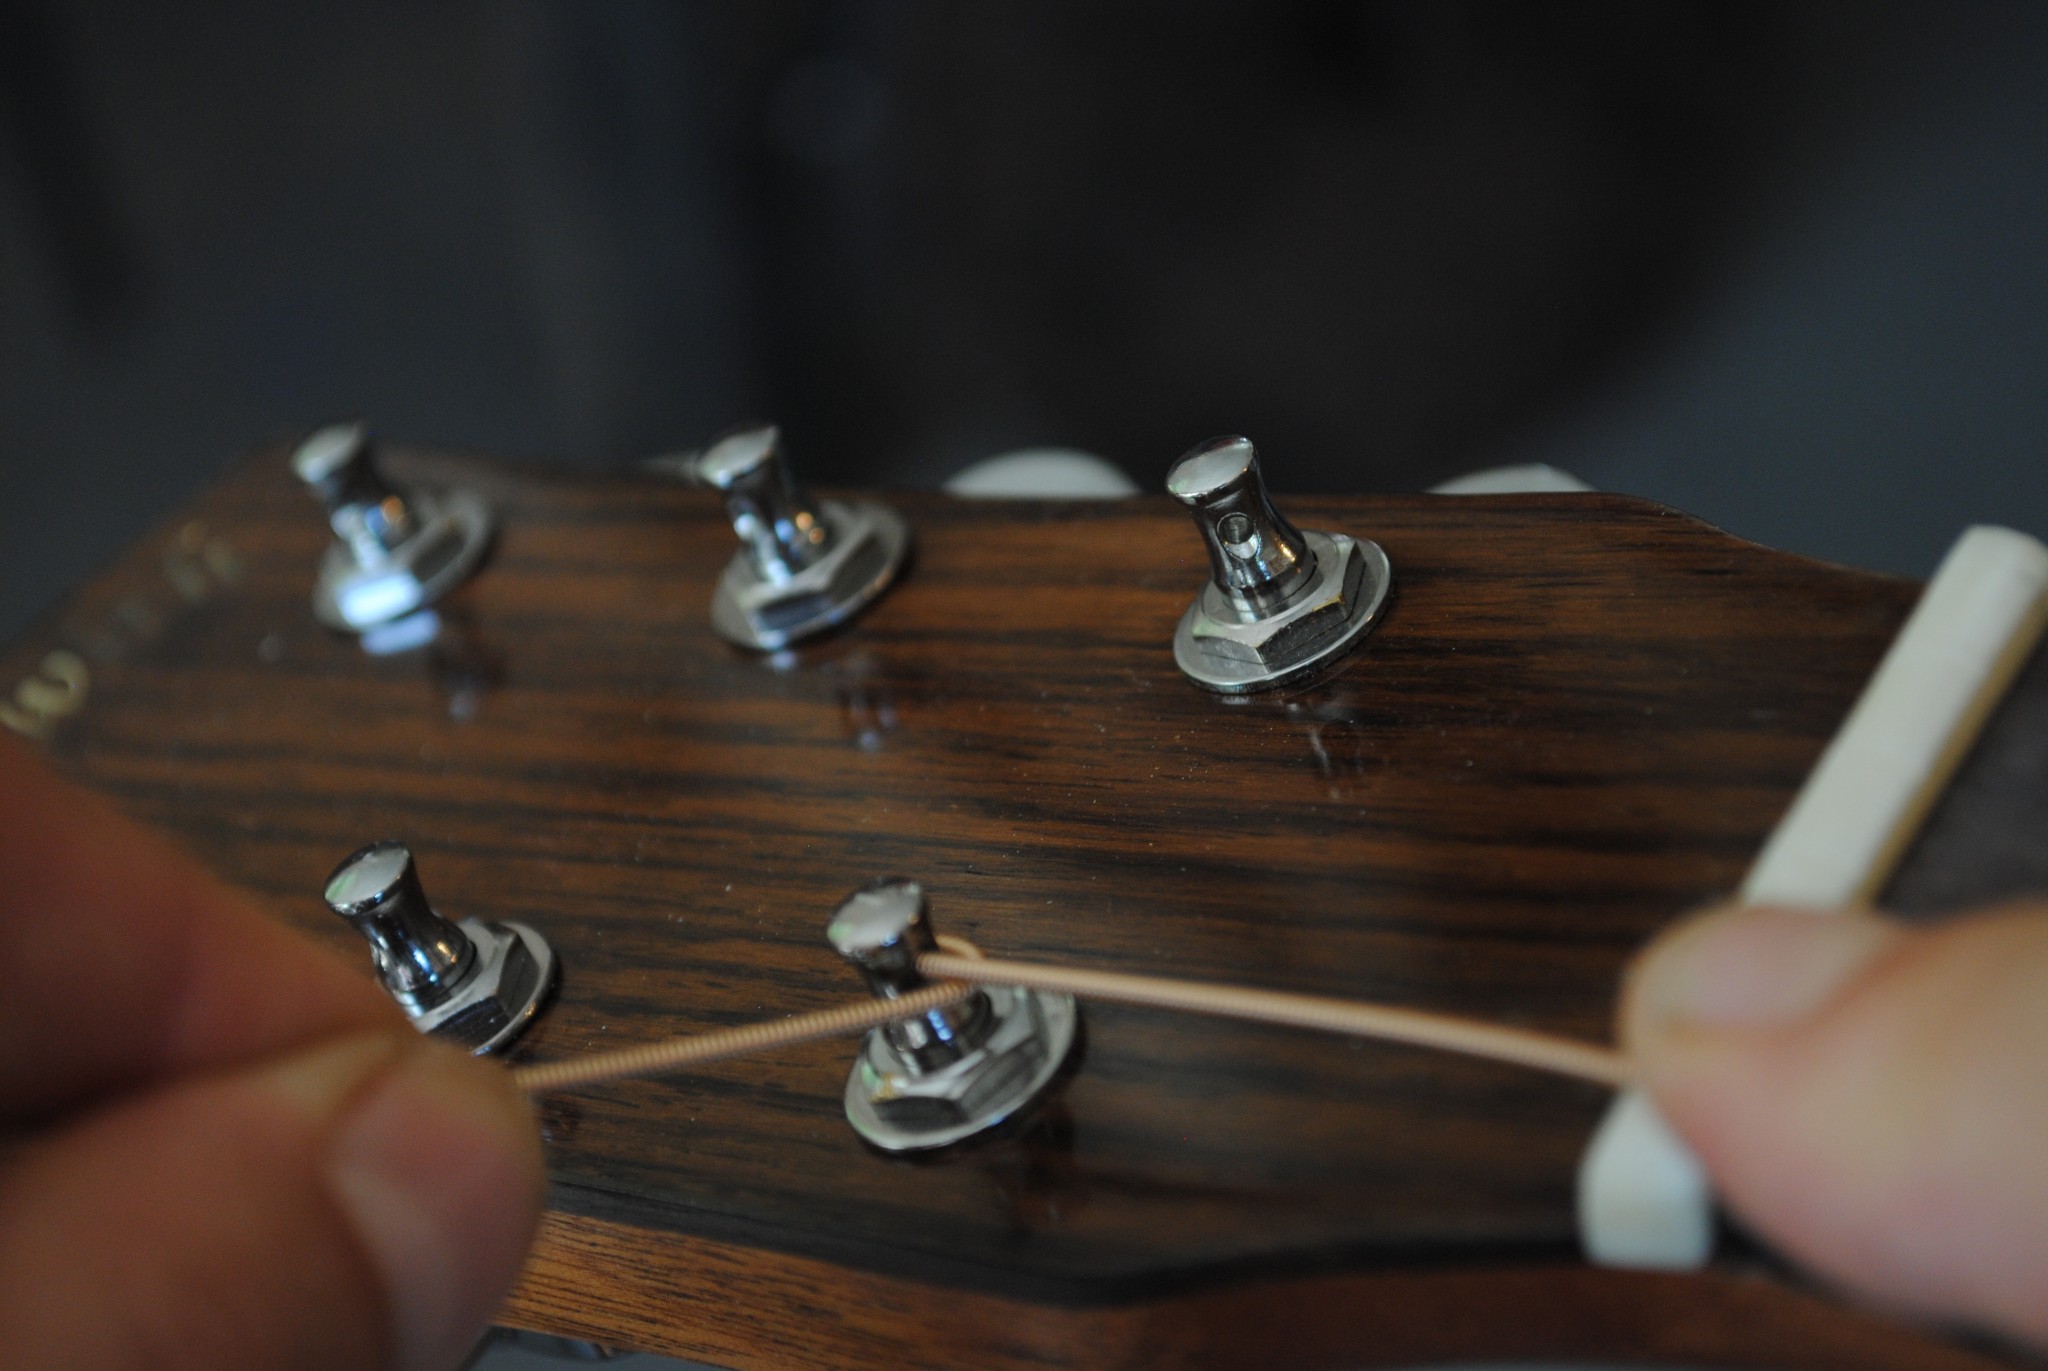
Once that bend has been made, bring it back around and under the string (between the nut and the tuner poster) then fold the string OVER towards the center of the headstock (figures 7 and 8). Start winding the string on the peg by turning the tuner button in the direction that the string Hold the string in one hand while pinning the excess string length with the index finger of that hand. Begin turning the tuner in the direction that will wind the string on the tuning post so it is on the inside of the tuner. Keep winding until taut. Proceed to installing the next string.
Tuning the Guitar
The next step is to bring the instrument up to concert pitch. We will use standard tuning (EADGBE) and a tuner. At this point, I recommend using a tuning instrument or have a piano handy to give you a reference tone. I prefer clip on tuners as pianos will not fit in my guitar case. Tune the Low E string first and proceed to the remaining five strings. Now you’re going to find that none of the strings are in tune and you have to go back and do it again
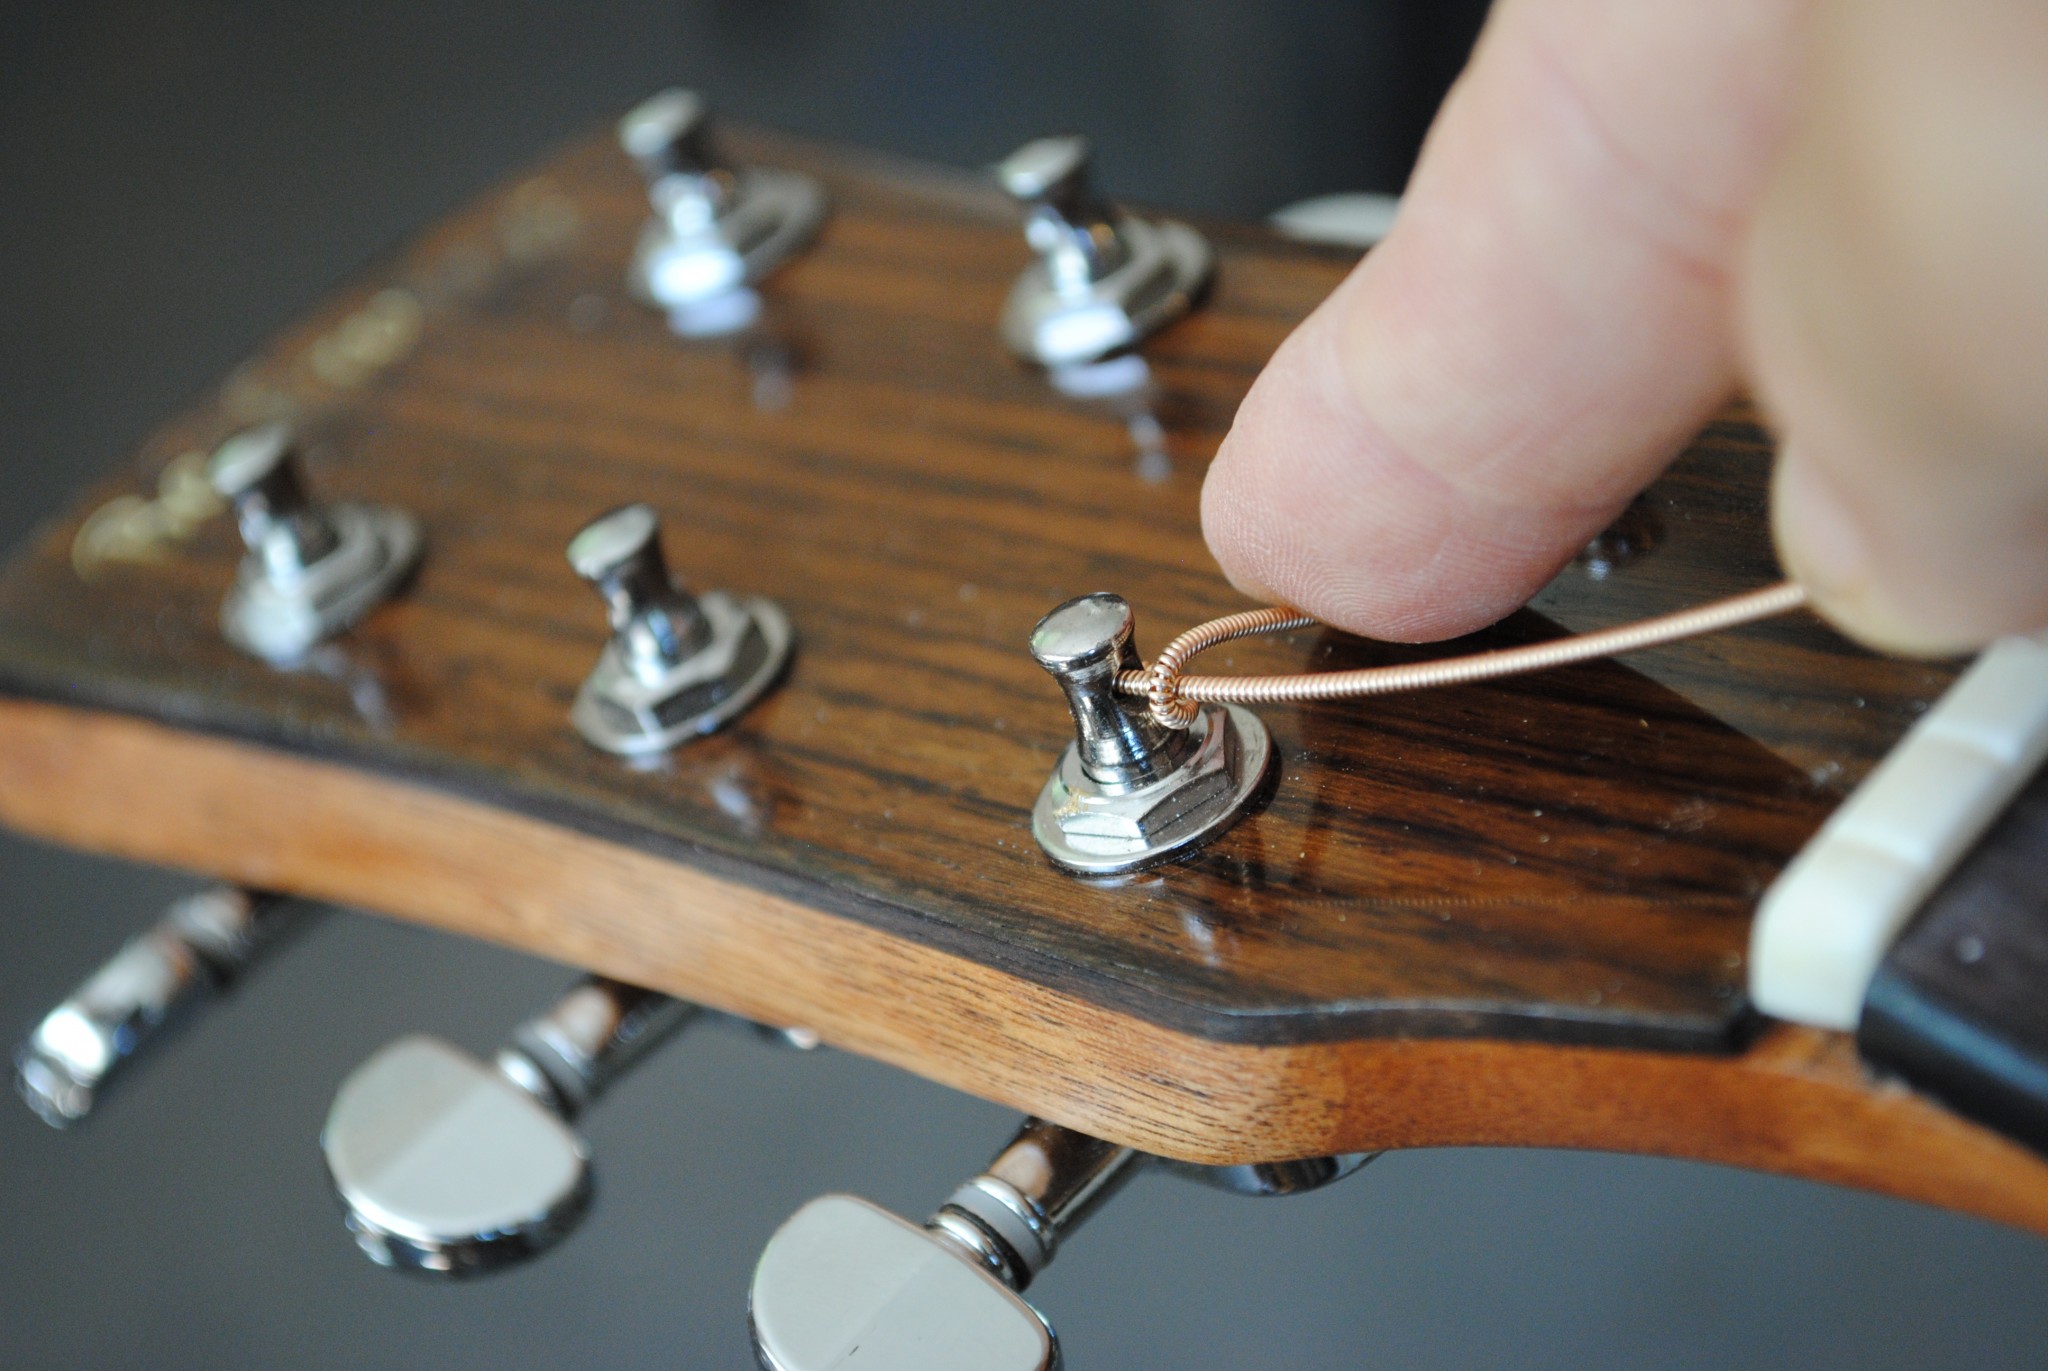
However, this time bring the low-E string slightly above the target tone and give the string a gentle tug by running two or three fingers under the entire length of the string (Figure 9). Once you’ve finished stretching the string. Check the tuning and tune again to the final pitch. Repeat this step of the remaining five strings.

New strings stretch and lose pitch until they reach their final length. This usually takes a few days. The stretching process described above greatly reduces the settling time to about the time it takes to play a few songs.
The final step is to use a pair of dykes (wire cutters) to trim the excess string from the tunings post(s). You can do this after each string is added, however I prefer this to be the last step in the process.
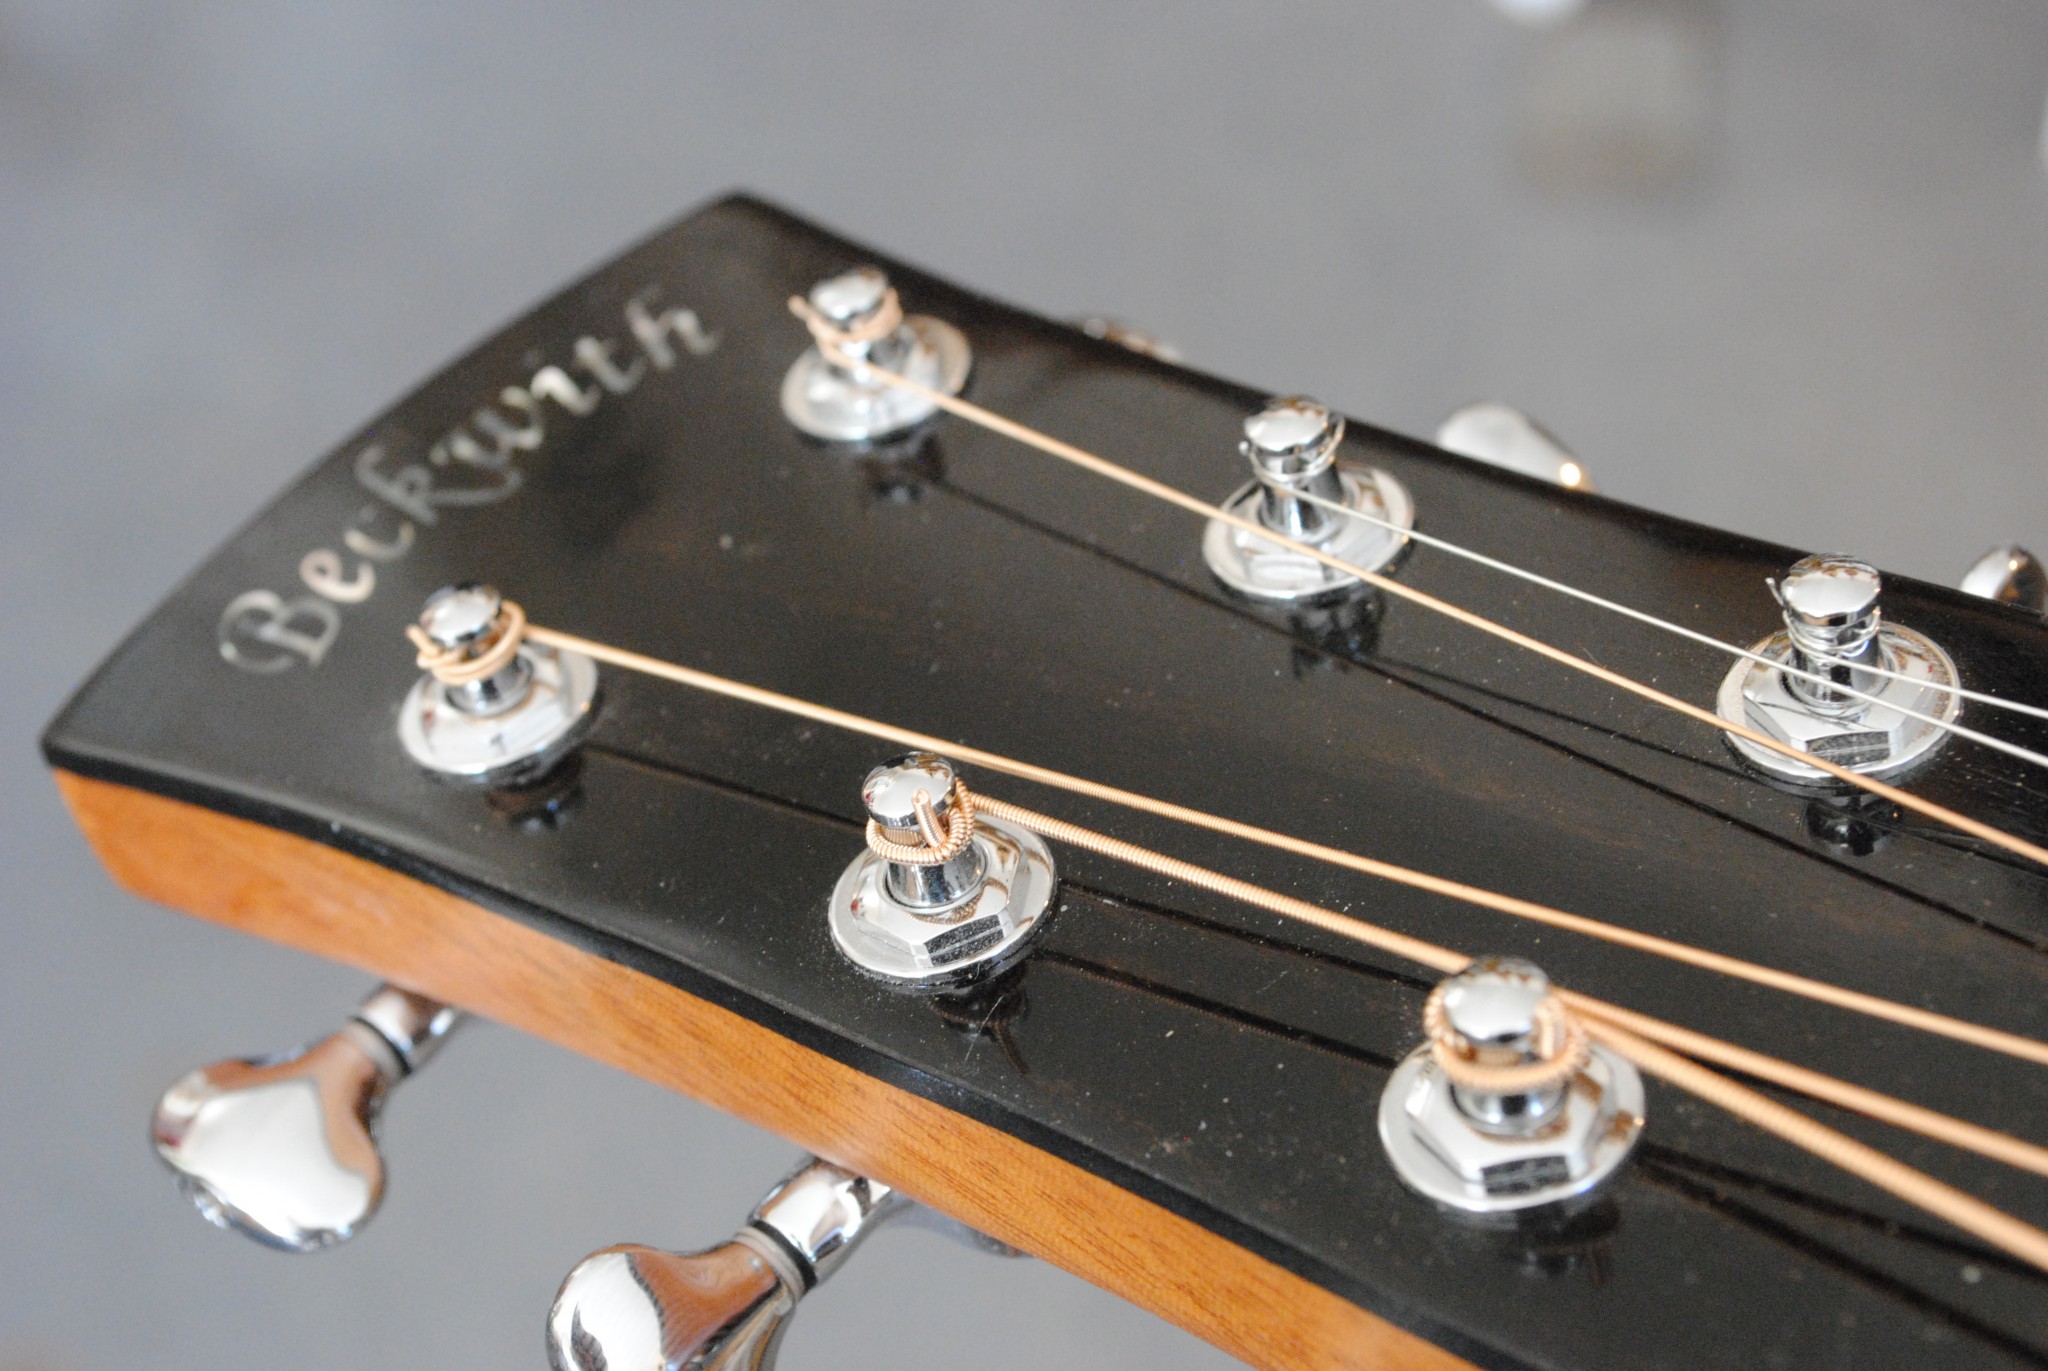
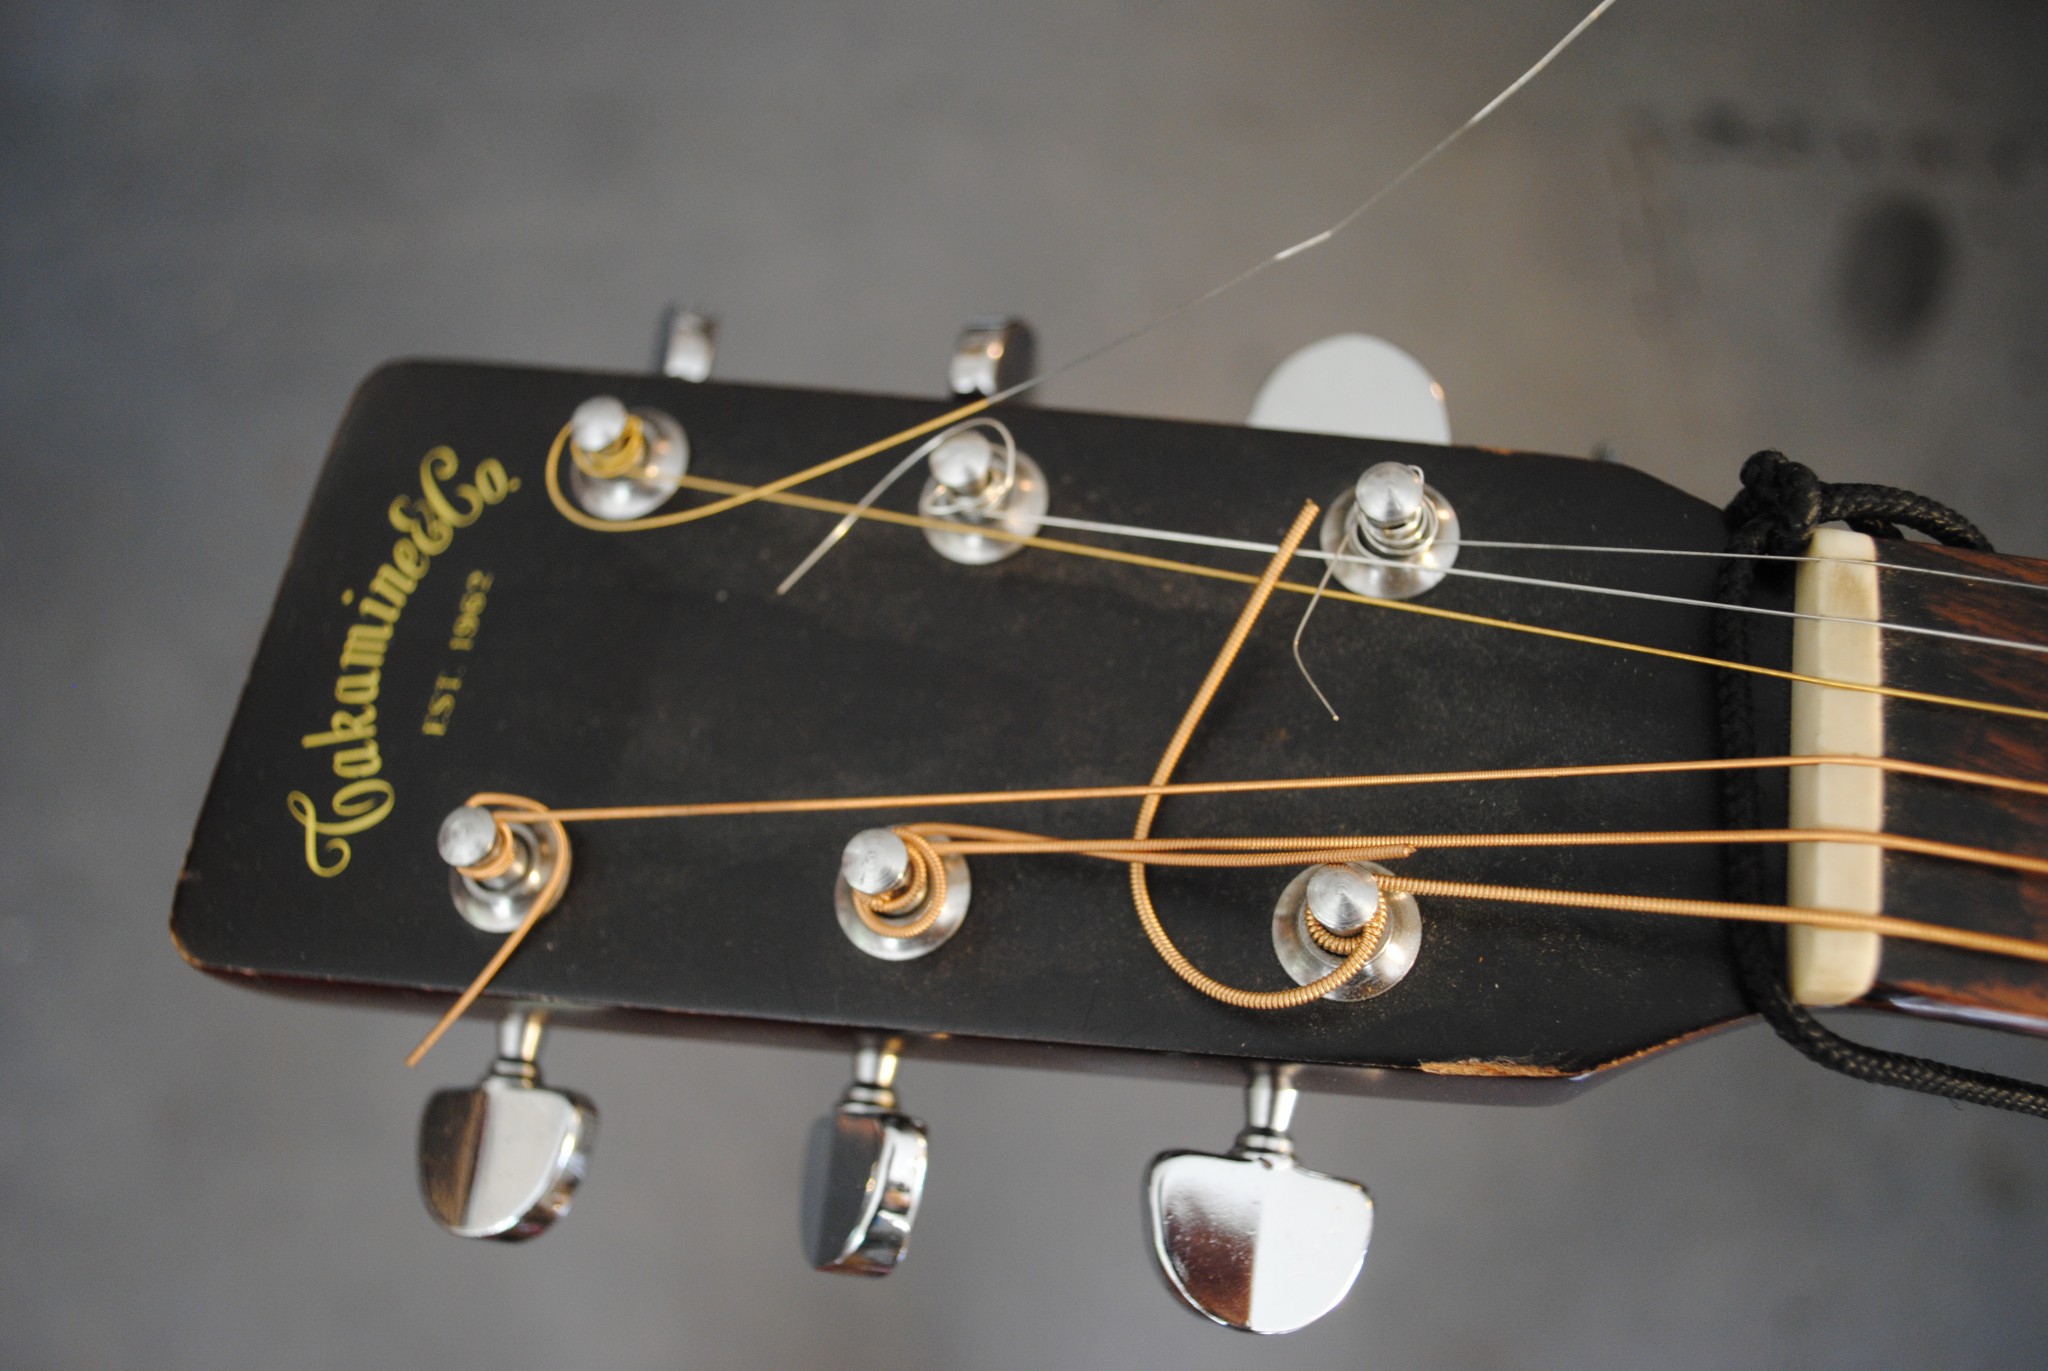
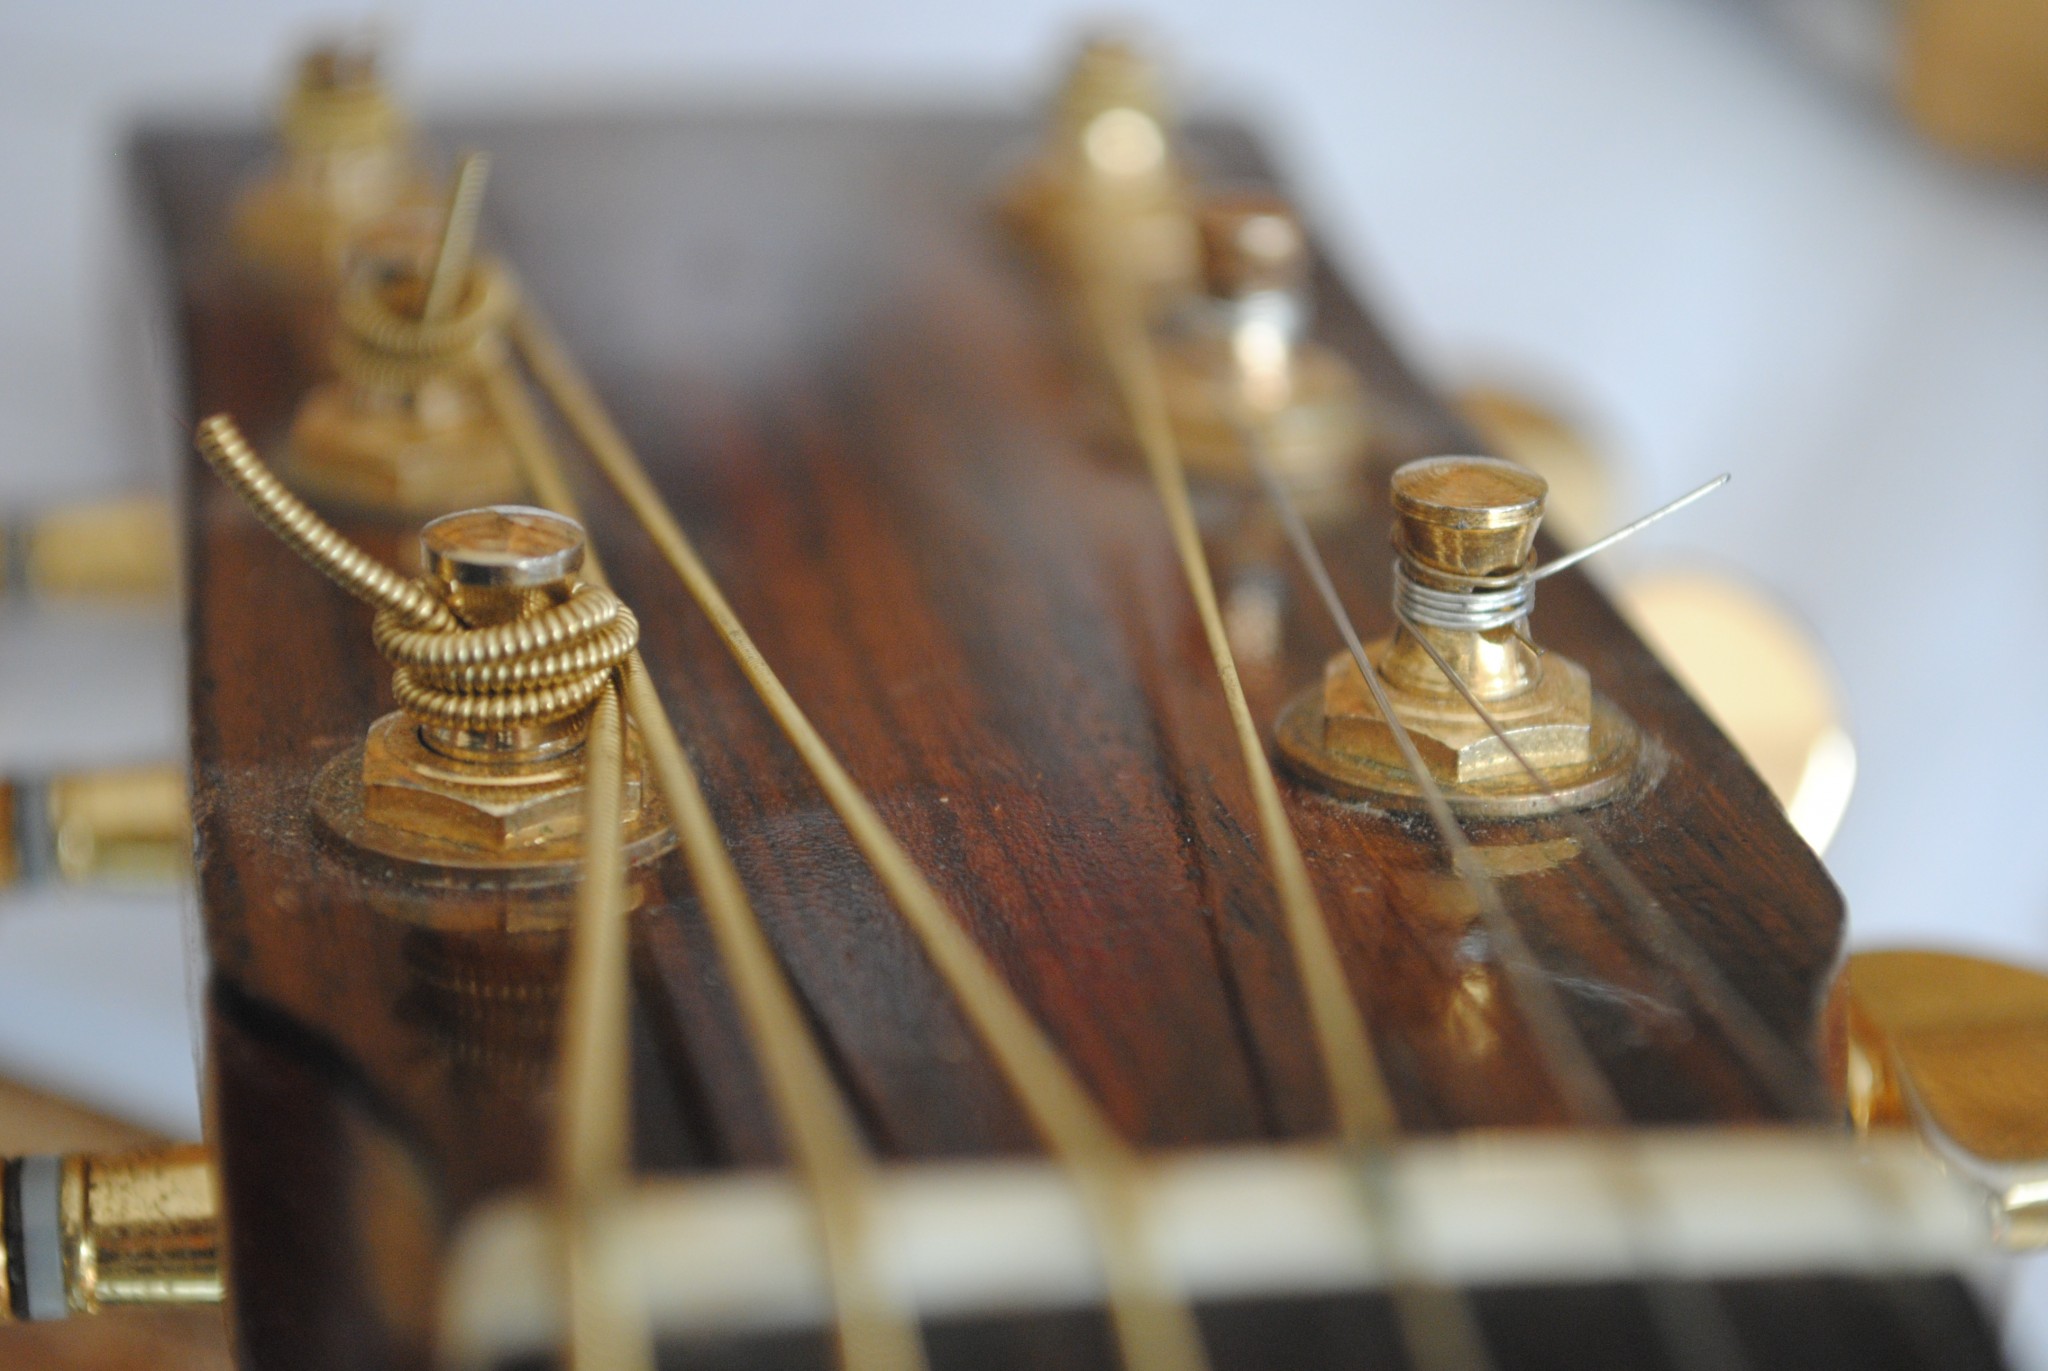
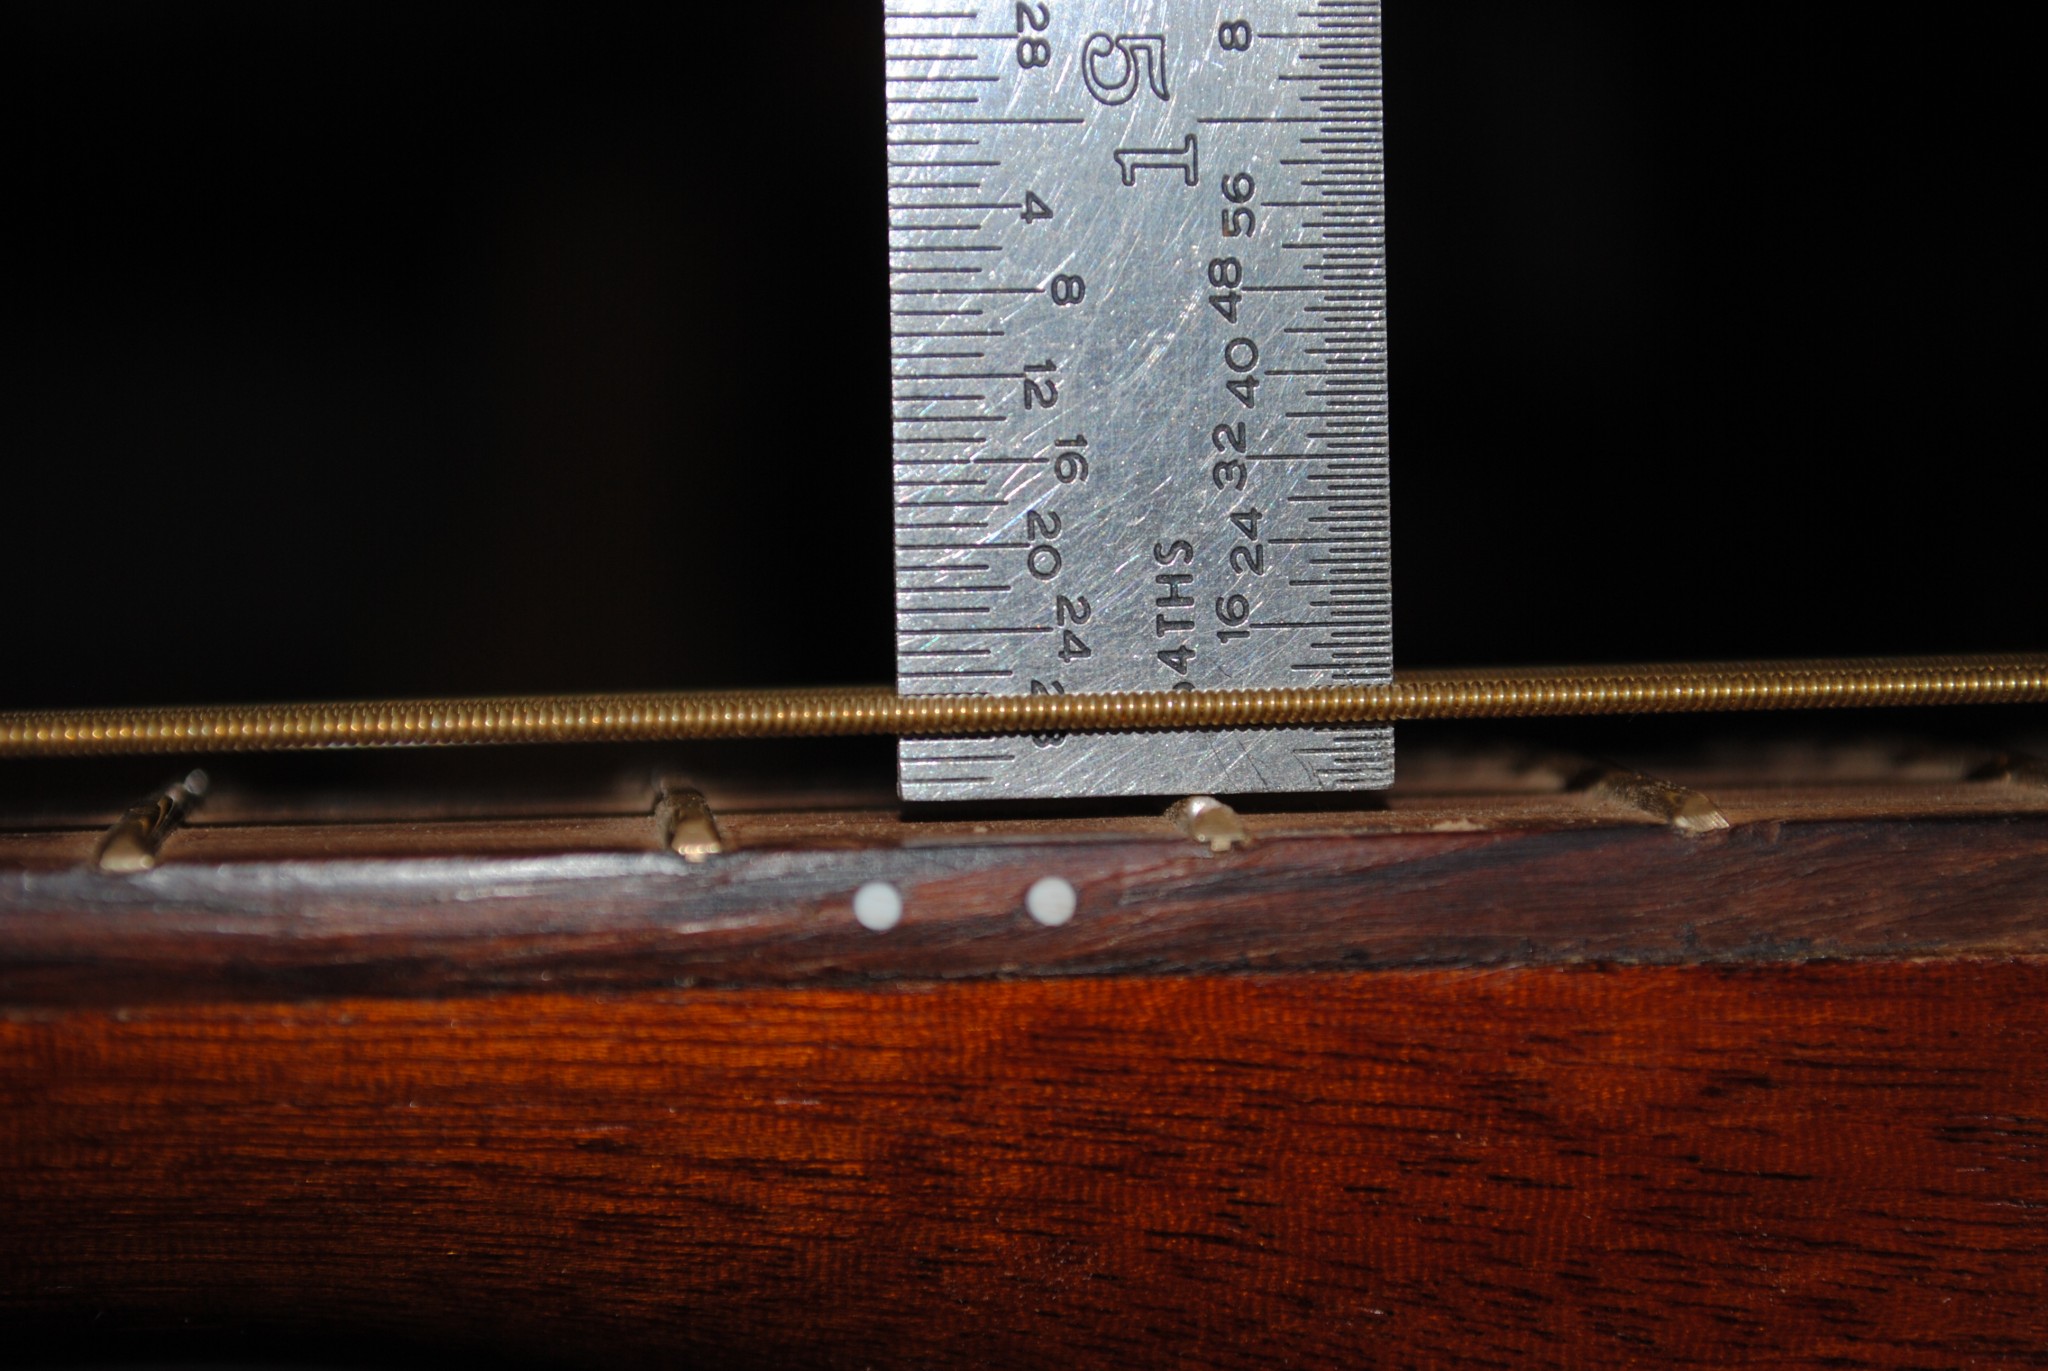
Figure 10 is of a well-strung instrument. Note each string only has two or three wraps on their respective posts. In contrast, Figures 11 and 12 illustrate some stringing which could lead to the problems described at the beginning of this text.
Keep Playing!
– Steve
 Steve Beckwith has handcrafted over one hundred acoustic stringed instruments to address the need of musicians unable to find the exact sound from mass manufacturing instruments.